")
Creating a personalized photo wall with beautiful frames is a fantastic way to showcase your memories and add a personal touch to your space. Here’s a step-by-step guide to help you design a stunning, curated photo wall:
1. Choose the Right Wall Space
- Location: Find a wall that can accommodate multiple frames. Ideal spots include the living room, hallway, or above a fireplace.
- Size: Make sure the wall has enough space for the layout you have in mind. If it’s a smaller space, consider creating a compact cluster of frames.
2. Select Your Photos
- Themes: Decide on a theme or style for your photo wall. It could be family memories, travel adventures, or a collection of your favorite moments with loved ones.
- Color Scheme: You can choose photos based on a color palette that complements the room’s decor or go for a black-and-white theme for a timeless look.
- Variety: Mix close-up portraits, landscapes, and candid shots for a dynamic and interesting display.
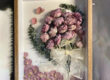
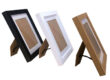
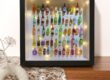
3. Pick Your Frames
- Style: You can go for a uniform look with the same type of frames (e.g., all black or all white frames) for a more organized aesthetic. Or you can mix different styles for a more eclectic feel (wood, metal, vintage, modern).
- Frame Sizes: Vary the sizes of your frames for visual interest. Larger frames can be focal points, while smaller frames fill in the gaps.
- Matting: Consider using mats (the space around your photos inside the frame) to create a polished, professional look. It’s great for making photos stand out.
4. Arrange the Frames
- Grid Layout: This is a symmetrical and balanced arrangement, ideal for a clean, orderly look. Align frames in rows and columns for structure.
- Gallery Wall: For a more organic feel, arrange the frames asymmetrically. Start with the largest frames in the center and work your way out with smaller ones. Play with spacing between frames for a casual but chic vibe.
- Cluster/Clustered Grouping: Group several small frames close together to create a “mini-gallery” effect. This works especially well if you have a lot of photos you want to showcase.
Pro Tip: Use painter’s tape to temporarily arrange the frames on the wall before you make it permanent. This will help you visualize the layout and adjust the spacing.
5. Consider the Placement of Your Frames
- Eye Level: Hang your photos at eye level for easy viewing. A common guideline is to place the center of the photo wall around 57–60 inches from the floor.
- Spacing: Keep your frames about 2–4 inches apart for a cohesive look, but experiment with spacing if you want a more relaxed, casual arrangement.
- Symmetry: If you prefer symmetry, ensure that the frames are aligned. For a more artistic and organic arrangement, feel free to mix up the placements.
6. Add Personal Touches
- Incorporate Other Elements: Add shelves or floating ledges where you can place frames, plants, and decorative items like vases or sculptures. This can break up the photo wall and add texture.
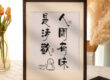
- Incorporate Quotes or Artwork: Include framed quotes, paintings, or artwork that matches the vibe of your photos. This could add depth to the wall and reflect your personal style.
- Lighting: Consider installing picture lights above or around your frames for a gallery-like effect. String lights can also add a cozy and whimsical touch.
7. Hang the Frames
- Leveling: Make sure all frames are level, using a spirit level or a ruler to line them up properly. It’ll give the entire wall a polished, professional look.
- Hooks and Nails: For heavier frames, use picture hanging hooks or nails to ensure they stay secure. For lighter frames, command strips are a great alternative to avoid wall damage.
8. Refresh Regularly
- Over time, you can change out photos to keep your photo wall fresh and interesting. Rotate new pictures in or swap the frames to match seasonal decor changes.
Additional Ideas:
- Frame Collage: Create a frame collage with overlapping photos for a trendy look.
- Vintage Frames: Mix old and new frame styles to create a blend of nostalgic and modern vibes.
- Gallery Ledges: Use open shelves to lean frames instead of hanging them, which gives you the flexibility to change the display over time.
A personalized photo wall not only helps preserve your memories but also adds personality to your home. Do you have a certain vibe or theme you’re aiming for, or are you still figuring it out? I can give more tips if you need!