")
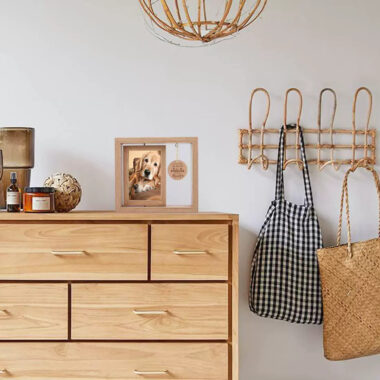
Displaying your photos in frames isn’t just about sticking them in a frame and hanging them up—it’s about curating your space, enhancing your décor, and showcasing your memories in the best way possible. Here’s how to properly display your photos to achieve maximum impact:
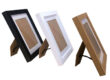
1. Choose the Right Frame for the Photo
- Match the Style: Ensure the frame complements the photo’s content and your room’s décor. For instance:
- Wooden frames go well with rustic, vintage, or natural-themed photos.
- Metal frames can be sleek and modern, perfect for black-and-white or contemporary photos.
- Ornate frames work best with classic or formal portraits.
- Frame Color: Neutral colors like black, white, or wood tones often work best. If your photo has bright colors, choose a frame that won’t clash but still complements the image.
2. Matting Your Photos
- What’s Matting?: Matting refers to the border around the photo inside the frame. It can enhance the photo’s appearance by providing contrast and drawing attention to the image itself.
- When to Mat: Use a mat for larger frames or when displaying important or formal photos. It also gives a professional look and adds visual interest.
- Consider Proportions: A thicker mat works well for larger images, while thinner mats suit smaller ones.
3. Lighting
- Natural Light: Display your photos in spots where they get enough natural light, but avoid direct sunlight, as it can fade colors over time.
- LED or Track Lighting: Use soft, focused lighting to highlight your framed photos, creating a gallery-like effect.
- Avoid Glare: Make sure to position the frames so that there’s no glare on the glass. Anti-glare glass is a great option if you want to avoid reflections.
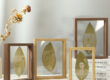
4. Create a Gallery Wall or Grid
- Gallery Wall: A collection of framed photos can create an impressive visual impact when displayed in a group. When arranging them, mix different sizes and frame styles for an eclectic look, or go for uniform frames for a more cohesive appearance.
- Symmetry or Asymmetry?: Symmetry creates a balanced, orderly look, while asymmetrical arrangements offer a more dynamic, playful feel. Both are effective depending on the style you’re going for.
- Spacing: Keep consistent spacing between frames—typically 2 to 4 inches for a neat, professional look.
5. Consider Framing Your Photos in Groups
- Theme-based Groupings: Group similar photos together, like family portraits, vacation shots, or landscapes. This makes for a cohesive and themed display.
- Variety of Sizes: Don’t feel limited to matching frame sizes—mixing large and small frames can create a more interesting and dynamic display.
- Vertical vs. Horizontal: Mix portrait and landscape orientations to avoid a rigid, predictable grid.
6. Consider the Wall or Surface Where They Will Be Displayed
- Height Placement: Generally, the center of your photo gallery or frame should be at eye level (about 57–60 inches from the floor). For a single frame, it should align at eye level with where you’ll most often view it.
- Walls and Corners: Large empty walls can be filled with a large frame or gallery wall, while smaller, cozy spaces might benefit from a single, striking frame that stands out.
- Using Shelves or Mantels: Instead of hanging all your frames, place them on a shelf or mantel for easy rearrangement. This is a great option for adding variety and flexibility.
7. Use Different Frame Types
- Floating Frames: These frames make the photo appear as though it’s floating inside the frame, which can add a modern, minimalist touch to your display.
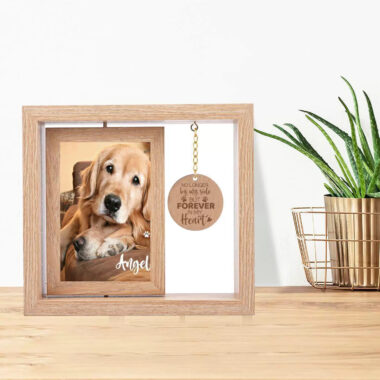
- Shadow Boxes: These deep frames are perfect for displaying items along with photos, such as mementos from special events, souvenirs, or 3D objects.
- Digital Frames: For a modern, dynamic display, digital photo frames allow you to upload a range of photos and even videos. You can rotate images based on your mood or season.
8. Create a Focal Point
- If you have one particular photo you want to highlight, place it in the center or above other framed pieces. Make it stand out with a larger frame or unique matting.
- For a personal touch, choose one large photo (e.g., a wedding photo, a favorite landscape, or a family portrait) and let it be the showstopper.
9. Maintain the Photos
- Regular Cleaning: Dust frames regularly and wipe them with a microfiber cloth. If you have glass-covered frames, be gentle to avoid scratching.
- Rotate Photos: Keep your display fresh by rotating photos every few months. It gives the space a new vibe and keeps the display interesting.
- Check for Fading: Over time, photos can fade due to light exposure. Make sure your frames have UV-protective glass, or consider displaying images that are less sensitive to light.
10. Use Personal Touches
- Handwritten Notes or Quotes: Pair your photos with meaningful quotes or short notes in the same frame. This adds an extra layer of personality and can help convey a deeper connection to the image.
- Add an Artistic Element: Consider displaying photos that are framed with artistic borders, vintage frames, or custom-designed frames to match the mood of your space.
By following these tips, you can elevate your space with thoughtfully displayed photos that not only capture memories but also enhance your home’s aesthetic. Do you have any favorite photos or places you’d like to display? I can help suggest specific framing ideas for them!